Quantcast
Channel: Code On Time
Viewing all 336 articles
Browse latest View live

Tools for Excel: Styles

$
0
0

This is a typical view of styles in a project.

image

Consult the following table when entering property values:

PropertyDescription
CSS ClassSpecifies the CSS class that will be assigned to the row when the test evaluates to true.
ViewThe view that the style belongs to.
ControllerThe controller that the style belongs to.
TestSpecifies a JavaScript expression that evaluates to true or false.

Tools for Excel: Items

$
0
0

This is a typical view of items in a project.

Typical view of items in a project.

Consult the following table when entering property values:

PropertyDescription
ValueSpecifies the value that will be inserted when this option is selected in the user interface.
Field NameSpecifies the field that the item belongs to.
ControllerSpecifies the controller that the field belongs to.
TextSpecifies the text displayed for the value.

Tools for Excel: Field Outputs

$
0
0

This is a typical view of field outputs in a project.

Typical view of field outputs in a project.

Consult the following table when entering property values:

PropertyDescription
FieldThe field being populated by this output.
Command IDThe controller command using the field output.
ControllerThe controller of the field output.

Assigning Access Key With Code

$
0
0

Both Azure Storage and Amazon S3 require a couple of security parameters and repository name in order to upload or download a file. The data controller configurations of both adapters require explicit definition of these parameters.

Let’s consider the configuration of an Azure Blob Adapter.

Field: Picture
Storage-System: Azure
Account: northwindproductpictures
Container: pics
Key: e2Wl668b6fEGauS6cOTAHaj7Ut6QfwKdbGY4Vd8yngz40y2f54M5EfZtSNNHYoXW7i7+kZAfFJrg==
Path-Template: Products/{ProductID}-{PictureFileName}

The application framework allows providing default values for Account, Container, and Key.

Start the app generator. Select your project and click Develop. The project will be opened in Visual Studio. In the Solution Explorer, right-click on ~\App_Code\Data, and press Add | Add New Item…

Adding a new item to the Data folder in a Code On Time Web Site Factory project.

Select Class from the list, specify a name, and press OK to add the new file.

Adding a class file to the project.

Replace the code base with the following. Use your own key instead of the highlighted text.

C#:

using System;
namespace MyCompany.Data
{
    public partial class AzureBlobAdapter
    {
        public override string Key
        {
            get
            {
                return "ENTER KEY HERE";
            }
        }
    }
}

Visual Basic:

Imports Microsoft.VisualBasic

Namespace MyCompany.Data
    Partial Public Class AzureBlobAdapter
        Public Overrides Property Key As String
            Get
                Return "ENTER KEY HERE"
            End Get
            Set(value As String)
                MyBase.Key = value
            End Set
        End Property
    End Class
End Namespace
Save the file, and activate the Project Designer. In the Project Explorer, switch to the Controllers tab and double-click on Products. Change the Blob Adapter Configuration as shown below.

Field: Picture
Storage-System: Azure
Account: northwindproductpictures
Container: pics
Path-Template: Products/{ProductID}-{PictureFileName}

The application framework will now use the key explicitly returned by the AzureBlobAdapter.Key property. 
The image thumbnails are loaded from Azure Storage using the new key.

The Account and Container properties may also be overridden in a similar fashion to further simplify the adapter configuration. Multiple virtual binary fields may share the same Account, Container, and Key. The implementation of the properties may optionally read values from the database depending on the user identity, role, or other conditions.

The Amazon S3 Adapter allows overriding properties AccessKeyID, SecretAccessKey, and Bucket.

Tools for Excel - Pages and Commands Hot Fix

Configuring SMTP Settings

$
0
0

In order to send emails from within your web app, the SMTP web.config settings must be configured. For example, the automatic password reminders sent by ASP.NET membership require an SMTP configuration.

Start the web app generator, and click on the project name. Select Settings, and click on Web Server Configuration option.

In the Web.Config modification instructions text box, insert your configuration. Model it after the sample displayed below:

InsertAfter: /configuration/connectionStrings
  <system.net>
    <mailSettings>
      <smtp deliveryMethod="Network" from="ben@contoso.com">
        <network
          host="localhost"
          port="25"
          defaultCredentials="true"
        />
      </smtp>
    </mailSettings>
  </system.net>

Press Finish, and regenerate the web app. The SMTP settings have been added to the web.config file and emails will now work as intended.

Learn more about configuring email settings.

Complex Queries

$
0
0

Suppose that you have a complex dataset that must be displayed in your web application. The application framework parses the command text in order to find expressions to correspond to data controller fields. These expressions are simple enough to used when dynamically constructing SQL SELECT statements at runtime.

However, the SQL parser in Code On Time has some limitations and may be unable to handle complex queries. In this situation, it would make more sense to offload the parsing to the database server and simply display the data as a view.

For example, suppose that it is necessary to display all phone numbers for shippers, suppliers, and customers grouped by CompanyName, Phone, and ContactName in a sample Northwind web app. Several UNIONs must be used in order to aggregate all the data. The SQL query is displayed below.

SELECT CompanyName, Phone, null as "ContactName"
FROM Shippers
    UNION
SELECT CompanyName, Phone, ContactName
FROM Customers
    UNION
SELECT CompanyName, Phone, ContactName
FROM Suppliers
GROUP BY CompanyName, Phone, ContactName

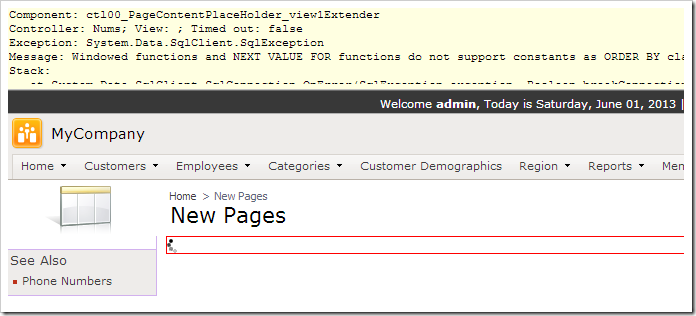
If one were to create a controller and use the query above as a command, they will receive an error message displayed below.

Error received when the command is too complex to be parsed.

Instead, let’s save the query as a view and add the view to the project.

Creating the View

Start SQL Server Management Studio. In the Object Explorer, right-click on Databases / Northwind / Views node, and press New View.

Adding a new view to the Northwind database.

In the SQL Pane, paste in the SQL script displayed below.

SELECT CompanyName, Phone, null as "ContactName"
FROM Shippers
    UNION
SELECT CompanyName, Phone, ContactName
FROM Customers
    UNION
SELECT CompanyName, Phone, ContactName
FROM Suppliers
GROUP BY CompanyName, Phone, ContactName

Save the view with the name “PhoneNumbers”.

Adding View to Project

Start the web app generator. Click on the project name, and press Refresh. Check the box next to PhoneNumbers, and continue to refresh the project.

Adding the PhoneNumbers view to the project via Refresh.

When refresh is complete, continue to regenerate the project.

Viewing the Results

When the web app opens in the default browser, navigate to New Pages | Phone Numbers page. The new view will be displayed without errors.

The Phone Numbers view is displayed properly in the generated web app.

Tall And Wide Pages

$
0
0

The picture below shows the standard page layout of a Web Site Factory application. The page features a membership bar at the top, followed by a page header and logo, a bar with application menu system, a page title, and page path. The is also a side bar on the left side of the page.

Employees page with standard page layout.

What if you want to maximize the real estate of the page and eliminate some of the standard page elements?

Using Custom CSS Classes

Start the Project Designer. In the Project Explorer, double-click on the Employees page node. Assign the following value:

PropertyValue
Custom StyleTall Wide HomePage

On the toolbar, press Browse. Class Tall hides the menu bar at the top of the page, class Wide hides the side bar and class HomePage replaces the yellow background with the standard home page background. These classes can be used in any combination.

Employees page with 'Tall' and 'Wide' custom class stying.

Maximize Real Estate of The Page

If the Tall and Wide custom classes are not small enough for the requirements, the page may be reduced even further with a user control.

In the Project Explorer, right-click on Employees / container1 node, and press New Control.

Adding a new control to 'container1' of Employees page.

Next to the User Control lookup, click on New User Control icon.

Creating a new user control.

Assign the user control a name:

PropertyValue
NameMaximizer

Press OK to create the user control. Press OK again to instantiate the user control on the Employees page.

On the toolbar, press Browse to generate the user control file. When complete, right-click on Employees / container1 / control1 – Maximizer and press Edit in Visual Studio.

Editing the control in Visual Studio.

The user control file will open in Visual Studio. Replace the existing code with the following:

C#:

<%@ Control Language="C#" AutoEventWireup="true" CodeFile="Maximizer.ascx.cs" Inherits="Controls_Maximizer" %>
<script type="text/C#" runat="server">
    protected void Page_Init(object sender, EventArgs e)
    {
        Page.Header.Controls.Add(new LiteralControl(
            "<style type=\"text/css\">" +
            "body {padding:0px!important;}" +
            // hide the membership bar
            "div.MembershipBar, div.MembershipBarPlaceholder {display:none!important;}" +
            // hide the page header and logo
            "div#PageHeader{display:none!important;}" +
            // hide the page title
            "#PageHeaderLeftSide,#PageHeaderContent," +
            "#PageHeaderRightSide{background-image:none!important}" +
            "#PageHeaderContent div.Title {display:none!important;}" +
            // hide the page path
           "#PageHeaderContent .SiteMapPath {display:none!important;}" +
            "</style>"));
    }
</script>

Visual Basic:

<%@ Control Language="VB" AutoEventWireup="false" CodeFile="Maximizer.ascx.vb" Inherits="Controls_Maximizer" %>
<script type="text/VB" runat="server">
    Protected Shadows Sub OnInit(ByVal sender As Object, ByVal e As EventArgs) Handles MyBase.Load
        Page.Header.Controls.Add(New LiteralControl(
            "<style type=""text/css"">" +
            "body {padding:0px!important;}" +
            "div.MembershipBar, div.MembershipBarPlaceholder {display:none!important;}" +
            "div#PageHeader{display:none!important;}" +
            "#PageHeaderLeftSide,#PageHeaderContent," +
            "#PageHeaderRightSide{background-image:none!important}" +
            "#PageHeaderContent div.Title {display:none!important;}" +
           "#PageHeaderContent .SiteMapPath {display:none!important;}" +
            "</style>"))
    End Sub
</script>

Switch back to the browser, and refresh the Employees page. Note that all page elements except the views and any page body styles have been hidden.

Employees page with all page elements hidden except the body.


Globalization and Localization

$
0
0

Globalization is the process of designing and developing applications that function for multiple cultures. Localization is the process of customizing your application for a given culture and locale. The topics in this section describe how to create ASP.NET web applications that can be adapted to different languages and cultures.

Learn more about globalization and localization of ASP.NET web applications at http://msdn.microsoft.com/en-us/library/c6zyy3s9.aspx.

Globalization

Code On Time web app generator allows explicit definition of globalization options in the Project Wizard.

Globalization and Localization page of Project Wizard.

Each application has a default culture. Unlimited edition of Code On Time allows specifying additional cultures. The browser culture will be detected and used, if available. The user may also manually specify the culture using the Language selector dropdown in the top right corner of the web app.

Localization

At run-time, the client library automatically replaces text elements wrapped in “localization tokens” when the culture is different from the default. The translations are stored as text constants in resource files. The client library matches the culture to the end of the text file name. For example, when the culture is changed to Canadian English, the client library will find translations in files that end with “en-CA.txt”.

For example, let’s examine the standard Welcome user control that is present in every web app. Notice that each text block is wrapped in a descriptive word surrounded by the carat (^) character.

<div style="padding-left: 8px">
    <div class="ParaInfo">
        ^SignInInstruction^Sign in to access the protected site content.^SignInInstruction^</div>
    <div class="ParaHeader">
        ^SignInHeader^Instructions^SignInHeader^</div>
    <div class="ParaText">
        ^SignInPara1^Two standard user accounts are automatically created when application is initialized if membership option has been selected for this application.^SignInPara1^</div>

    <div class="ParaText">
        ^SignInPara2^The administrative account <b>admin</b> is authorized to access all areas of the web site and membership manager. The standard <b>user</b> account is allowed to access all areas of the web site with the exception of membership manager.^SignInPara2^
    </div>

    <div class="ParaText">
        ^SignInPara3^Move the mouse pointer over the link <i>Login to this web site</i> on the right-hand side at the top of the page and sign in with one of the accounts listed below.^SignInPara3^</div>

    <div class="ParaText">
        <div style="border: solid 1px black; background-color: InfoBackground; padding: 8px; float: left;">
            ^AdminDesc^Administrative account^AdminDesc^:<br />
            <b title="User Name">admin</b> / <b title="Password">admin123%</b>
            <br />
            <br />
            ^UserDesc^Standard user account^UserDesc^:<br />
            <b title="User Name">user</b> / <b title="Password">user123%</b>
        </div>
        <div style="clear: both; margin-bottom: 8px"></div>
    </div>
</div>

Let’s provide our own translations for the “en-CA” culture that will replace the text wrapped in tags.

Customizing Localization

Start the web app generator and click on the project name. Select Settings, and then click on Globalization and Localization. In the Supported Culture Sets text box, enter the following:

PropertyValue
Supported Culture Setsen-US; en-CA;

Press Finish and regenerate the web app. When complete, click on the project name and press Open to open the project folder. In the search box, type in “en-CA.txt”. This will reveal all translation files for the “en-CA” culture.

All localization files for 'en-CA' culture.

Open the file “Welcome.ascx.en-CA.txt”. Notice that each element is wrapped in named tags surrounded by the carat (^) symbol. The client library will match the tags with those in the Welcome user control and replace the text at run-time.

Make the highlighted changes:

*******************************************************************************
Your application uses this file to locate resource strings defined
in Welcome.ascx project item.

Replace the text between localization brackets as needed.
*******************************************************************************

^AdminDesc^This is the Canadian Administrative account^AdminDesc^

^SignInHeader^Canadian Instructions^SignInHeader^

^SignInInstruction^Sign in to access the protected site content.^SignInInstruction^

^SignInPara1^Two standard user accounts are automatically created when application is initialized
    if membership option has been selected for this application.^SignInPara1^

^SignInPara2^The administrative account <b>admin</b> is authorized to access all areas of the
    web site and membership manager. The standard <b>user</b> account is allowed to
    access all areas of the web site with the exception of membership manager.^SignInPara2^

^SignInPara3^Move the mouse pointer over the link <i>Login to this web site</i> on the right-hand side
    at the top of the page and sign in with one of the accounts listed below.^SignInPara3^

^UserDesc^Standard user account^UserDesc^

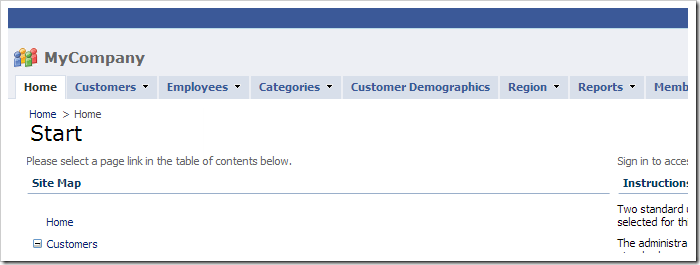
Save the file, and switch to the application open in the browser. Refresh the Home page. Use the Language dropdown in the top-right corner to change to English (Canada). Note that the changes made previously have been applied to the text in the Welcome control on the right side of the page.

Custom translations are applied for the Welcome user control.

In addition to any text translations, any money or date formatting for the culture will be used as well. If the culture supports right-to-left, the website will be formatted accordingly.

Preserving Localization Between Code Generation Library Updates

Code generation library updates automatically replace the previous versions of the code generation files. A backup of the web app can be restored from [My Documents]\Code OnTime\Backup when it happens. You can create a copy of your localizations and restore them after each update.

You can also submit the completed localization file sets to Code On Time for inclusion in the general distribution of the code generation library. The localization file sets will be shared with the community and will get installed automatically with each update. If you have localizations to contribute, please zip up the files and submit a ticket.

Handling the “Report…” Action

$
0
0

Code On Time web applications support out-of-the-box reporting capabilities that require zero programming.

Standard Report Actions

All data views offer four standard actions that yield a different output.

  • Action “ReportAsPdf” will render the data presented to end users as a Adobe PDF document. The shorthand action “Report” will produce the same result. This type of report requires a compatible software installed on the client computer to view and print the report output. You can download free Adobe Acrobat Reader at at http://get.adobe.com/reader.
     
  • Action “ReportAsImage” creates a TIFF image file, which requires a compatible software installed on the client. TIFF format supports multiple pages and is a perfect alternative to PDF. The quality of output in PDF and TIFF formats is equivalent.
     
  • Action “ReportAsWord” renders a report as a Microsoft Word document with a high-quality output. In some instances, the output is less precise than the output produced by the action “ReportAsImage” and “ReportAsPdf”.
     
  • Action “ReportAsExcel” produces a Microsoft Excel spreadsheet that offer a lesser quality output due to rendering restrictions of Excel files.

If a user  requests a “Report...” action then a report is rendered on the server with the help of Microsoft Report Viewer. The output is streamed to the client browser. Typically a prompt is displayed before a compatible installed software viewer will be activated. Users also have an option to save the output locally. If a viewer is not installed on the client computer, then the prompt to save the file is the only option.

Code On Time web applications execute various server calls off-band to provide a smooth Web 2.0 user experience. Modern web browsers make sure to prevent all sorts of popups initiated by the scripts embedded in the web pages. The client library makes use of correct techniques to process reports on the server without triggering popup blockers.

Custom Report Action Handlers

Code On Time web applications created with version 6.0.0.19 or higher allow developers to perform custom processing of reporting actions in business rules. There are several reasons that may require an execution of  custom code that must precede or override the standard report rendering logic:

  • The data must be “prepared” before a report is rendered.
  • The report request must be logged.
  • An external report rendering engine is available. The custom code will redirect the report request to such an engine.
  • A special report preview page needs to be displayed.
  • A custom report building code must execute. The custom code replaces the standard report rendering logic.

To modify the behavior of the Report action, create a business rule and implement methods to handle the corresponding “Report...” actions.

Passing Action To An External URL

Start the Project Designer. In the Project Explorer, switch to the Controllers tab. Right-click on Customers / Actions node, and press New Action Group.

Adding a new action group to Customers controller.

Assign the following value:

PropertyValue
ScopeAction Column

Save the new action group. Right-click on Customers / Actions / ag100 (ActionColumn) and press New Action.

Adding a new action to action group 'ag100'.

Assign these values:

PropertyValue
Command NameReport
Command Argument_blank

Press OK to save. Right-click on Customers / Business Rules node, and press New Business Rule.

Adding a new business rule to Customers controller.

Assign the following values:

PropertyValue
TypeC# / Visual Basic
Command NameReport
Command Argument_blank
PhaseExecute

Save the business rule. Press Browse on the toolbar to generate the business rule file.

When complete, right-click on Customers / Business Rules / Report, _blank (Code / Execute) – r100 node and press Edit Rule in Visual Studio.

Opening the business rule file in Visual Studio.

The file will be opened in Visual Studio. Replace the existing code base with the following:

C#:

using System;
using MyCompany.Data;

namespace MyCompany.Rules
{
    public partial class CustomersBusinessRules : MyCompany.Data.BusinessRules
    {
        [Rule("r100")]
        public void r100Implementation(string customerID, 
            string companyName, 
            string contactName, 
            string contactTitle, 
            string address, 
            string city, 
            string region, 
            string postalCode, 
            string country, 
            string phone, 
            string fax)
        {
            // Redirect user to another URL
            Result.NavigateUrl = String.Format(
                "~/Pages/Customers.aspx?CustomerID={0}&_controller=Customers" +
                "&_commandName=Select&_commandArgument=editForm1",
                customerID);
        }
    }
}

Visual Basic:

Imports MyCompany.Data
Imports System

Namespace MyCompany.Rules
    
    Partial Public Class CustomersBusinessRules
        Inherits MyCompany.Data.BusinessRules
        <Rule("r100")> _
        Public Sub r100Implementation(ByVal customerID As String,
                                      ByVal companyName As String,
                                      ByVal contactName As String,
                                      ByVal contactTitle As String,
                                      ByVal address As String,
                                      ByVal city As String,
                                      ByVal region As String,
                                      ByVal postalCode As String,
                                      ByVal country As String,
                                      ByVal phone As String,
                                      ByVal fax As String)
            ' Redirect user to another URL
            Result.NavigateUrl = String.Format( _
                "~/Pages/Customers.aspx?CustomerID={0}&_controller=Customers" + _
                "&_commandName=Select&_commandArgument=editForm1",
                customerID)
        End Sub
    End Class
End Namespace

Save the file. The business rulewill use the ID of the selected customer to compose a URL relative to the application. The URL will open in a new browser window and will force the application to select a customer with the specified ID.

The new window will open if your have entered the command argument as “_blank” when defining the action in Project Designer. If action command argument has been left blank then the new URL will replace the page in the web browser. Users will have an option to return to the previous page using the browser’s Back button.

Switch back to the web app open in the browser window and navigate to Customers page. A new action button will be present in the leftmost column.

'Report' action in the leftmost action column.

Click on the Report button - a new browser window will open. You can see that the address bar is reflecting values from the selected customer.

New browser window opened with URL parameters from the previously selected customer.

Our web application is using its own capabilities to present the data with the help of data controller URL parameters. You can redirect the report action to a generic web request handler or to a web-enabled report server such as Crystal Reports or Microsoft SQL Server Reporting Services.

Overriding the Report Action

Switch back to the Project Designer. Right-click on Customers / Business Rules and press New Business Rule.

Adding a new business rule to Customers controller.

Use the following configuration:

PropertyValue
TypeC# / Visual Basic
Command NameReportAsImage
PhaseExecute

Save the business rule. Right-click on Customers / Business Rules / ReportAsImage (Code / Execute) – r101 node, and press Edit Rule in Visual Studio.

Opening the business rule file in Visual Studio.

Replace the code base with the following:

C#:

using System;
using MyCompany.Data;
using System.IO;

namespace MyCompany.Rules
{
    public partial class CustomersBusinessRules : MyCompany.Data.BusinessRules
    {
        [Rule("r101")]
        public void r101Implementation(string customerID, 
            string companyName, 
            string contactName, 
            string contactTitle, 
            string address, 
            string city, 
            string region, 
            string postalCode, 
            string country, 
            string phone, 
            string fax)
        {
            PreventDefault();
            // return the same image in response to all "Report..." commands
            Context.Response.Clear();
            Context.Response.ContentType = "image/jpeg";
            Context.Response.AddHeader("Content-Disposition",
                String.Format("attachment;filename={0}.jpg", customerID));
            byte[] reportData =
                File.ReadAllBytes(@"C:\Users\Public\Public Pictures\Sample Pictures\Koala.jpg");
            Context.Response.AddHeader("Content-Length", reportData.Length.ToString());
            Context.Response.OutputStream.Write(reportData, 0, reportData.Length);
        }
    }
}

Visual Basic:

Imports MyCompany.Data
Imports System
Imports System.IO

Namespace MyCompany.Rules

    Partial Public Class CustomersBusinessRules
        Inherits MyCompany.Data.BusinessRules
        <Rule("r101")> _
        Public Sub r101Implementation(ByVal customerID As String,
                                      ByVal companyName As String,
                                      ByVal contactName As String,
                                      ByVal contactTitle As String,
                                      ByVal address As String,
                                      ByVal city As String,
                                      ByVal region As String,
                                      ByVal postalCode As String,
                                      ByVal country As String,
                                      ByVal phone As String,
                                      ByVal fax As String)
            PreventDefault()
            'return the same image in response to all "Report..." commands
            Context.Response.Clear()
            Context.Response.ContentType = "image/jpeg"
            Context.Response.AddHeader("Content-Disposition", _
                String.Format("attachment;filename={0}.jpg", customerID))
            Dim reportData As Byte() = _
                File.ReadAllBytes("C:\Users\Public\Public Pictures\Sample Pictures\Koala.jpg")
            Context.Response.AddHeader("Content-Length", reportData.Length.ToString())
            Context.Response.OutputStream.Write(reportData, 0, reportData.Length)
        End Sub
    End Class
End Namespace

Save the file.

This business rule takes control over the report rendering completely.

First, the method cancels out the default reporting logic at the very beginning by calling PreventDefault. The method uses the customer ID to assign the file name to the output. Next, it reads the file C:\Users\Public\Public Pictures\Sample Pictures\Koala.jpg and streams it out. If you are reproducing this sample on a Windows 7 computer then there is not need to change the code . Otherwise change the path to the image file accordingly.

In a real-world application you can produce any sort of output using custom code.

Switch back to the browser, navigate to Customers page and select a customer. Choose Report | Multipage Image on the action bar.

Triggering the ReportAsImage action from the action bar.

The custom method will execute and you will  be prompted to download the file AROUT.jpg.

Browser prompting to download a file.

Click Open and the default image viewer will start.

The koala image is displayed. The file name is inherited from the CustomerID.

If you select any other customer and choose the same action bar option then exactly the same image will be downloaded but the file name will reflect the primary key of the selected customer.

In a real-world applications you will likely stream other formats of output such as PDF or custom Microsoft Office documents using 3rd party reporting software.

Custom Login Form

$
0
0

Code On Time web apps automatically include a dropdown login box pictured below when membership is enabled. As an alternative, a dedicated login page may be created. Learn more about the dropdown login box and dedicated login page.

Automatic dropdown login control in Code On Time web apps.

Sometimes it may be necessary to place the login control on another page. This can be easily done by adding the <asp:Login /> control to any .aspx page.

Let’s place a login control on the home page. Start the web app generator, click on the project name, and press Develop to open the project in Visual Studio. In the Solution Explorer, double-click on ~\Pages\Home.aspx.

Page 'Home.aspx' selected in the Solution Explorer.

Notice that there are two <asp:Content> elements in the page. Append the highlighted line to the end of the second element.

<%@ Page Language="C#" MasterPageFile="~/Main.Master" AutoEventWireup="true" 
    CodeFile="Home.aspx.cs" Inherits="Pages_Home" Title="^HomeTitle^Start^HomeTitle^" %>

<%@ Register Src="../Controls/TableOfContents.ascx" TagName="TableOfContents" TagPrefix="uc" %>
<%@ Register Src="../Controls/Welcome.ascx" TagName="Welcome" TagPrefix="uc" %>
<asp:Content ID="Content1" ContentPlaceHolderID="PageHeaderContentPlaceHolder" runat="Server">
    ^HomeTitle^Start^HomeTitle^
</asp:Content>
<asp:Content ID="Content2" ContentPlaceHolderID="PageContentPlaceHolder" runat="Server">
    <div factory:flow="NewRow" xmlns:factory="urn:codeontime:app-factory">
        <uc:TableOfContents ID="control1" runat="server"></uc:TableOfContents>
    </div>
    <div factory:flow="NewColumn" xmlns:factory="urn:codeontime:app-factory">
        <uc:Welcome ID="control2" runat="server"></uc:Welcome>
    </div>
    <asp:Loginrunat="server" /></asp:Content>

Save the file, and press F5 to open the web site in a browser window. The standard login control will be present at the bottom of the page.

Standard ASP.NET login control is present at the bottom of the page.

Password Recovery

$
0
0

Code On Time web apps using ASP.NET Membership automatically come configured with a password recovery form. This form can be opened by clicking on the Forgot your password? link on the dropdown login form.

The Forgot your password? link access the Password Recovery form.

When the user enters their User Name and Password Answer correctly, a new password will be sent to the email on file.

The Password Recovery form.

There are situations in which it may be necessary to allow users to access this form from a different location within the web app. In addition, if Custom Membership is used, the Forgot your password? link is not present. Let’s place the password recovery form in a custom user control and add this control to the home page.

Start the Project Designer. In the Project Explorer, right-click on Home / container2 node, and press New Control.

Adding a new control to the Home page.

Next to the User Control lookup, click on the New User Control icon.

Creating a new user control.

Assign a name to the user control:

PropertyValue
NamePasswordRecoveryForm

Press OK to save the user control. Press OK again to instantiate the user control on the Home page.

On the toolbar, press Browse to generate the user control. When complete, right-click on Home / container2 / control3 – PasswordRecoveryForm node and press Edit in Visual Studio.

Editing the user control in Visual Studio.

The file will open in Visual Studio. Replace the existing code after the <%@Control%> element with the following:

<asp:PasswordRecovery runat="server" />

Press OK to save the file. Switch back to the browser. Notice that the Password Recovery form is placed after the Instructions text box on the Home page.

The standard password recovery form on the home page.

Note that you must configure SMTP settings in order for the password recovery email to be sent by the application.

Customizing the Header

$
0
0

The page header is displayed at the top of every page in a web application. By default, the application namespace is displayed in the header, along with the standard theme logo.

Default page header and logo in a Code On Time web app.

Let’s customize the header.

Changing Header Text and Icon

Start the web app generator. Click on the project name, select settings, and press Features. In the Page Header text box, paste the following:

PropertyValue
Page Header
<span style="color:darkred;">Code On Time</span>

Press Finish and continue to regenerate the web app. When complete, click on the project name and press Develop to open the project in Visual Studio.

In the Solution Explorer, drop your logo image into ~\App_Themes\MyCompany folder.

Dropping the logo file into MyCompany theme folder.

Next, right-click on ~\App_Themes\MyCompany and press Add | Style Sheet. Leave the default name and press OK to create the file “StyleSheet.css”.

Adding a style sheet to the MyCompany theme folder.

Replace the contents with the following:

div#PageHeaderBar {
    background-image: url(colorlogo.png);
    height:42px;
    padding-top:30px;
}
    div#PageHeaderBar span {
        margin-left: 110px;
        font-size:32px;
    }
Save the file, and refresh the browser window. The new logo and header will be visible.

Code On Time web app with customized header text and logo.

Placing a Custom User Control in the Header

Sometimes it may be necessary to place dynamic content in the header area. Let’s create custom user control that will be displayed in the header on the Customers page.

Start the Project Designer. In the Project Explorer, right-click on Customers page node and press New Container.

Adding a new container to the Customers page.

Press OK to save the container with default settings. In the Project Explorer, right-click on Customers / c101 container and press Rename.

Renaming the new container.

Change the container name to “page”, and press Enter key to save.

User controls in the container “page” will be placed in special placeholders on the page when the app is generated. The name of the control instance determines the placeholder.

Right-click on Customers / page, and press New Control.

Adding a new control to the 'page' container.

Next to the User Control lookup on the form, click the New User Control icon.

Creating a new user control.

Assign a name to the new user control.

PropertyValue
NameCustomerHeader

Press OK to create the new user control. Press OK to save the properties of the control instance and have it added to the Customers / page container.

Right-click on Customers / page / control1 – CustomerHeader and press Rename.

Renaming the new control in the 'page' container.

Change the name to “header” and press Enter key to apply the change.

On the toolbar, press Browse. When generation is complete, navigate to the Customers page. The page will look like the picture below if there are no style sheet rules affecting the header area.

Unchanged custom user control replacing the default header text.

Dynamically Updating the Page Header

Let’s change the custom user control to make it display the primary key value from the selected data row of the Customers master data view.

Right-click on Customers / page / header – CustomerHeader and press Edit in Visual Studio.

Editing the control in Visual Studio.

Replace the existing code base after the <%@Control%> element with the following:

<asp:UpdatePanel ID="UpdatePanel1" runat="server">
    <ContentTemplate>
        <asp:Button ID="Button1" runat="server" style="margin-left:120px;"
            Text="Get Customer Info" OnClick="Button1_Click" />
        <asp:Label ID="Label1" runat="server" Text="Label"></asp:Label>
    </ContentTemplate>
</asp:UpdatePanel>

Right-click anywhere in the file, and press View Code. Add the following method:

C#:

protected void Button1_Click(object sender, EventArgs e)
{
    Control dataViewExtender = Parent.NamingContainer
        .FindControl("PageContentPlaceHolder").FindControl("view1Extender");
    Label1.Text = ((MyCompany.Web.DataViewExtender)dataViewExtender).SelectedValue;
}

Visual Basic:

Protected Sub Button1_Click(ByVal sender As Object, ByVal e As EventArgs)
    Dim dataViewExtender As Control = Parent.NamingContainer.
        FindControl("PageContentPlaceholder").FindControl("view1Extender")
    Label1.Text = CType(dataViewExtender, MyCompany.Web.DataViewExtender).SelectedValueEnd Sub

Save the file. The event handler will respond to a click on the button “Button1”. First, it will find the instance of “view1Extender”. Next, the selected value will be copied to the label “Label1”.

Switch back to the browser. Navigate to the Customers page, and notice that the header text has been replaced with a button and a label.

Customized user control replacing the header element.

Select a customer, and press Get Customer Info button. The label will be updated with the selected Customer ID.

The header label is dynamically updated with the selected CustomerID.

Customizing the Page Title

$
0
0

Every page in a generated web app has a title, displayed directly under the path. To change the page path in the navigation menu, use drag & drop techniques to move the page to the desired location.

Default Title text displayed under the navigation menu.

Let’s change the title of the Customers page.

Specifying a Page Title

Start the Project Designer. In the Project Explorer, double-click on Customers page node.

Customers page node selected in the Project Explorer.

Change the title:

PropertyNew Value
TitleCustomer List

Press OK to save. On the toolbar, press Browse. Notice that the Customers page title now says “Customer List”.

The new Title text is now applied.

It may be necessary to update the text of the header dynamically. Create a custom user control for complex page title customization.

Placing a Custom User Control in the Title

In the Project Explorer, right-click on Customers / page container node and press New Control.

Creating a new control in the 'page' container of Customers page.

Next to the User Control lookup, click on the New User Control icon.

Creating a new user control.

Assign a user control name:

PropertyValue
NameCustomerTitle

Press OK to create the user control. Press OK to save the properties of the control instance and have it added to the Customers / page container.

Right-click on the new control Customers / page / control1 – CustomerTitle, and press Rename.

Renaming the 'control1' user control on Customers page.

Change the name to “title” and press Enter key to save changes.

The user control has been renamed to 'title'.

On the toolbar, press Browse. Notice that the title text has been replaced with the custom user control.

The title text has been replaced with a custom user control.

Right-click Customers / page / title – CustomerTitle and press Edit in Visual Studio option in the context menu to start customization.

Customizing the Sidebar

$
0
0

The sidebar is displayed on the left side of every content page. The About box displays a description for the page. The See Also box shows other pages on the same level in the navigation menu. The Summary box displays information about the selected record, if enabled for the specific view.

The sidebar contains the Summary, About, and See Also boxes.

Customizing the About Box

Start the Project Designer. In the Project Explorer, double-click on Customers page node.

Customers page node in the Project Explorer.

Change the About This Page property:

PropertyNew Value
About This PageThis page displays a list of customers.

Save the page. On the toolbar, press Browse. Notice that the text in About box has been updated.

The About box text has been updated.

Hiding See Also Box

The See Also box displays links to pages on the same hierarchy level. Let’s hide the See Also box.

In the Project Explorer, double-click on Customers page node.

The Customers page node in the Project Explorer.

Change the following:

PropertyNew Value
Custom StyleNoSeeAlso

Press OK to save. On the toolbar, press Browse. Notice that the See Also box has disappeared.

The See Also box is no longer present in the sidebar.

Custom content may be added to the sidebar in the form of a user control.

Placing a Custom User Control in the Sidebar

In the Project Explorer, right-click on Customers / page container node, and press New Control.

Adding a new control to the 'page' container on the Customers page.

Next to the User Control lookup, click on the New User Control icon.

Creating a new user control.

Assign a name to the user control.

PropertyValue
NameCustomerSidebar

Press OK to save the new user control. Press OK to add the user control to the page.

Right-click on Customers / page / control1 – CustomerSidebar node, and press Rename.

Renaming 'control'1 control on the Customers page.

Change the name to “sidebar”, and press Enter key to apply changes.

The control has been renamed to 'sidebar'.

On the toolbar, press Browse. Notice that the user control is now present in the sidebar.

The user control has been added to the sidebar.


Customizing the Footer

$
0
0

The footer is displayed at the bottom of every page in a web app. The text will display a standard copyright message by default.

Default footer copyright text displayed at the bottom of the page.

Let’s customize the footer content.

Changing the Footer Text

Start the web app generator and click on the project name. Select Settings, and click on Features. In the Copyright text box, enter the following:

PropertyNew Value
Copyright
&copy;<b> Code On Time LLC</b> All rights reserved.

Press Finish, and then press Generate to continue regenerating the web app. Notice that the new copyright message is displayed.

The customized footer content displayed at the bottom of the page.

A custom user control may be used when more complex or dynamic content is necessary.

Placing a Custom User Control in the Footer

In the Project Explorer, right-click on Customers / page container node, and press New Control.

Creating a new control in the 'page' container.

Next to the User Control lookup, click on the New User Control icon.

Creating a new user control.

Assign a name to the new user control:

PropertyValue
NameCustomerFooter

Press OK to save the user control. Press OK to add the control to the Customers page.

Right-click on Customers / page / control1 – CustomerFooter control node, and press Rename.

Renaming the 'control1' control on the Customers page.

Change the name to “footer” and press Enter key to apply the change.

The name of the control has been changed to 'footer'.

On the toolbar, press Browse. Notice that the user control has replaced the footer content.

The user control has replaced the footer content.

Multiple Databases

$
0
0

Multiple database services are common in the modern business environment. Code On Time generator has the capability to tie this data together in a single web application.

In this example, DB1 holds the Categories and Products tables of an web-based order management system. DB2 holds the Suppliers table used by the purchasing department. You can see the database schemas in the picture below.

The schemas for databases DB1 and DB2.

Suppose that business requirements demand displaying vendor information next to the product name. We would like to add fields in Products to capture information from the Supplier, as well as allow access to information about Suppliers, all in the same application.

How do we overcome the physical separation of DB1 and DB2?

Take a look at the default web app generated from DB1 below. You will see that two pages have been created for Categories and Products, respectively. We will need to add Suppliers to this web app as well.

Categories and Products are available in the DB1 database.

Code On Time Generator does not support generation from multiple databases. Creating an application that handles different data sources will require a combined sample database that you can generate from. After the web app is created, you can change the connection strings to connect the remote data. In this example, it would be easiest to add the Suppliers table to DB1. Also, add SupplierID and SupplierCompanyName to the Products table. These fields, while not foreign keys in the database, will capture information from DB2 when we set them up as lookups.

Adding Suppliers Table to DB1

Start SQL Server Management Studio. In the Object Explorer, right-click on Databases / DB1 / Tables node, and press New Table.

Adding a new table to database DB1.

Assign the following values:

Column NameData TypeAllow Nulls
SupplierIDintno
CompanyNamenvarchar(50)no
ContactNamenvarchar(50)yes
ContactTitlenvarchar(50)yes
Addressnvarchar(50)yes
Citynvarchar(50)yes
Regionnvarchar(50)yes
PostalCodenvarchar(50)yes
Countrynvarchar(50)yes
Phonenvarchar(50)yes
Faxnvarchar(50)yes
HomePagentextyes

Press Ctrl+S to save the table. Assign the table a name of “Suppliers”.

Entering the name for 'Suppliers' table.

In the Object Explorer, right-click on Databases / DB1 / Tables / dbo.Products table node, and press Design.

Designing the Products table of database DB1.

Add the following columns:

Column NameData TypeAllow Nulls
SupplierIDintyes
SupplierCompanyNamenvarchar(50)yes

Save the table. Switch back to the app generator, click on the project name, and press Refresh.

Check the boxes next to Products controller and dbo.Suppliers table, and click Refresh.

Refreshing Products and Suppliers tables.

Proceed to regenerate the application.

When complete, notice that the Suppliers page has been added to the web app. However, there are no suppliers to be found. We will need to change the connection string for the Suppliers controller.

No suppliers are present in DB1 database.

Adding a Second Connection String

Switch back to the app generator. Click on the project name, and press Settings. Click on Web Server Configuration.

In the Web.Config modification instructions textbox, add the following:

AppendChild: /configuration/connectionStrings
<add name="DB2" connectionString="Data Source=.;Initial Catalog=DB2;Integrated Security=True;" providerName="System.Data.SqlClient" />

Press Finish to skip to the Summary page. Click Design to activate the Project Designer. In the Project Explorer, switch to the Controllers tab and double-click on Suppliers controller node.

The Suppliers controller selected in the Project Explorer.

Change the Connection String Name property:

PropertyValue
Connection String NameDB2

Press OK to save.

Configuring Cross-Database Lookups

Double-click on Products / Fields / SupplierID node.

SupplierID field in the Products controller.

Make the following changes:

PropertyValue
Items StyleLookup
Items Data ControllerSuppliers
Data Value FieldSupplierID
Data Text FieldCompanyName
New Data ViewcreateForm1
CopySupplierCompanyName=CompanyName

Press OK to save. At the top of the Project Browser window, switch to the Data Fields tab. Assign an Alias of “SupplierCompanyName” to all SupplierID data fields.

Setting the Alias of SupplierID data fields to 'SupplierCompanyName'.

In the Project Explorer, double-click on Products / Fields / SupplierCompanyName (String(50)) node.

SupplierCompanyName field selected from the Products controller.

Switch to the Data Fields tab. Mark all data fields as hidden.

Marking the SupplierCompanyName data fields as hidden.

Viewing the Results

On the toolbar, press Browse. Navigate to the Products page, and start editing a record. Click on the SupplierCompanyName lookup – a list of suppliers will be displayed.

The lookup displays a list of suppliers.

Select a supplier. The ID will be inserted into the field, but the name will be displayed.

The Supplier lookup displays the Company Name.

How to Configure CKEditor

$
0
0

Client library uses HTMLEditorExtender control to provide rich text editing capabilities. The rich text editor can be enabled for a data field using the Text Mode property. The picture below shows rich text editor enabled on the Description field of Categories controller.

Default Ajax Control Toolkit rich text editor control.

The popular open source WYSIWYG text editor CKEditor can be enabled as a replacement.

First, download a copy of CKEditor. There are multiple versions with different features and licensing terms that can be downloaded at http://ckeditor.com/download. Every download package contains “ckeditor” folder. Extract the folder to the root of your project output.

Copying the ckeditor folder into the project folder.

Note that the picture above shows a Web Site Factory project. The target folder for other types of projects will be under the “WebApp” folder.

Switch back to the app generator. Proceed to regenerate the web application. The generator will detect the presence of the ckeditor folder and automatically reconfigure the code to link ~/ckeditor/ckeditor.js to the pages. The client library will detect if CKEDITOR type is available and use it for rich text fields.

Navigate to the Categories page, and start editing a record. CKEditor will now be used instead. The example below shows CKEditor 4.1.2 Standard.

CKEditor control has replaced the standard rich text editor control.

Note that if you are trying multiple versions of CKEditor to preview its capabilities, make sure to clear the browser cache every time the files are replaced.

Tools for Excel–Enhanced App Generator Detection

$
0
0

Tools for Excel release 1.0.8.2 will correctly detect the app generator installed with “For Everyone” option. Install this update if you are receiving an instruction to download Code On Time even though it is installed on your computer.

App generator will not perform check for new releases when launched from Tools for Excel.

ASP.NET 4.5, DotNetNuke 7, Upload on Insert, CKEditor, Dynamic Wait Indicators, Azure SDK 2.0, Native CSV Import, Container “page”

$
0
0

Code On Time release 7.0.9.0 includes major enhancements  providing the foundation for the upcoming Mobile Client Library and 2nd generation datasheet view. Both will be included in the follow-up release in July of 2013.

ASP.NET 4.5 has been available for awhile. We now offer support for the newest .NET Framework in  Web Site Factory, Web App Factory, and Azure Factory projects.

Starting with this release any new apps configured to use ASP.NET 4.5 (default option) will be created without dependency on Ajax Control Toolkit DLLs. We will be phasing out the toolkit by replacing any dependencies with jQuery equivalents. Existing projects that do use components of ACT will continue to be generated with the binary libraries.

Master page, theme, and script references where enhanced to further reduce application footprint and speed up page loading. Mobile client library requires this enhancement.

DotNetNuke 7 is now supported in DotNetNuke Factory. Create ASP.NET 4.0 line-of-business web apps as modules for the latest version of the populate open-source content management system. New theme Gravity is included to provide a matching look-and-feel for the apps packaged as DNN modules.

Upload on Insert is a frequently requested feature that was previously absent in the application framework. Binary content is uploaded independently from the data fields of a new record. This creates a unique challenge to delay uploading until a record has been successfully persisted. The new client library does just that. New projects will automatically include BLOB fields in createForm1 to allow upload on insert. Just make sure that the binary columns are not marked as required in the database. Drag binary fields to the createForm1 view to enable this capability in existing apps.

CKEditor is a popular web-based rich text editor embedded in many online products. We are offering a simple integration of this editor in any project created with the new release of the app generator. The built-in rich text editor is now implemented without server-side support and works entirely on the client, which makes it lightning-fast.

Dynamic Wait Indicators are now  a permanent feature of the client library. If a server-side operation takes longer than 3/4 of a second to complete, then a thin marquee line will be displayed at the top of the data view. Modal views will display a wait indicator at the top of a page. This applies to data paging/sorting/search, action execution, reporting, import, upload, and download. Consistent integration of dynamic wait indicators improves usability by offering intelligent visual clues about long running requests. Navigate to our demo web site and try printing a list of customers to see the wait indicator in action.

Azure SDK 2.0 is now supported in Azure Factory projects.

Native CSV Import classes are  implemented in web apps created with Premium or Unlimited edition. The new importer is built into the application framework, which eliminates the need for Microsoft Access Database Engine installation on the server. “Import” action is now also included under Actions menu of data views in Azure Factory web apps. Import dialog simplifies mapping of fields by hiding “mapped” fields from available mapping options.

Container “page” allows defining user controls that will be displayed in page header, title, sidebar, or footer.

The following enhancements, bug fixes, and features are included in this release:

  • ASP.NET 4.5 is now supported in Web App Factory, Web Site Factory, and Azure Factory projects.
     
  • Application Framework now includes a native CSV parser based on the work of Sébastien Lorion. Both SharePoint Factory and Azure Factory projects are now supporting the “Import” action with native CSV parsing.
     
  • Web Site Factory solution files are now located under [Documents]\Code OnTime\Solutions\Web Site Factory\PROJECT_NAME folder. The new solution file will be created if a website factory project is regenerated. If you are using a source control system then make sure to change the project bindings accordingly.
     
  • Theme file is referenced with the app generator version number in the page header.
     
  • Azure SDK 2.0 is now supported in Azure Factory.
     
  • Ajax Control Tookit 7.0429 is now integrated in the apps based on ASP.NET 3.5 and 4.0.
    Upgrade instructions for ASP.NET 4.0 projects:
    • Make sure to delete file ~/App_Code/Controls/RichEditor.* from the source code of your Web Site Factory project.
    • Delete the files MyCompany\Controls\RichEdit.* from other project types where MyCompany must be replaced with the Namespace of your project.
    • Select the project on the start page of the app generator and choose Refresh, do not select any controllers and click Refresh.
    • Re-generate the app.
       
  • Custom *.rdlc reports are now published with Web Site Factory projects.
     
  • CKEditor is seamlessly integrated in web apps created with Code On Time.
     
  • Removed references to "stub" images from the master page.
     
  • Main master page is not using “cellpadding”, “cellspacing” and “valign” attributes. It relies on new CSS rules instead.
     
  • Built in Rich Text editor and CKEDITOR will take at least as much space as specified by the CSS class "dataview-rich-text". Define a custom CSS rule with “width” and “height” property to set up a non-standard size for rich text editors.
     
  • Application pages include “lang” and “xml:lang” attributes in “html” tag when loaded in a browser.
     
  • Application framework stylesheet Core.css incorporates the core styles from AjaxControlToolkit to handle calendar, tab container, color picker, and HTML editor to minimize the number of CSS links in application pages.
     
  • Thanks to Giampaolo Bulleri for contributing Italian localization.
     
  • Membership component of the client library explicitly sets up the path to Authentication_JSON_AppService.axd of a web app when initialized.
     
  • App generator will place controls with IDs 'header', 'title', 'sidebar', and 'footer' into appropriate regions of a page if the controls belong to a page container 'page'.
     
  • Enter NoSeeAlso class in "Custom Styles" property of a page to hide the corresponding area created automatically by the class library.
     
  • The "Reset" button on automatic search bar has been replaced with "Clear" button. The new button will simply remove all filters.
     
  • BLOB fields can now be added to the "createForm1" or any other view that offers Insert command. BLOB uploading is deferred until the primary key is returned after a successful insert operation.
     
  • New projects will automatically include BLOB fields in 'createForm1'. Developers can add BLOB fields to existing data controller views 'createForm1' manually.
     
  • CSS class "dataview-loading" is added to a data view container when a data view makes a first call to fetch data. Class "dataview-loaded" will replace "dataview-loading" after the first call has been completed.
     
  • Client library will open a new window when the original of a BLOB field is downloaded by user. The data view will display a marquee indicating the download progress. The new window is twice smaller than the main browser window.
     
  • Server-side business rules (Code and SQL) do not interfere with Blob Adpaters updating utility fields.
     
  • Data fields with text mode set to "Static" work correctly in grid view when inline editin of row values is performed by a user.
     
  • Application framework includes FileSystemBlobAdapterBase class to allow override of file system blob adapter property IsPublic.
     
  • "Soft" date filters created with SQL business rules will correctly filter the data.
     
  • Import automatically adjust the list of the available unmapped fields to ease selection of mappings.
     
  • Main and Help master pages are using a short form of DOCTYPE declaration.
     
  • Methods AccessKey, SecretAccessKey and property Bucket of S3BlobAdapter are now virtual
Viewing all 336 articles
Browse latest View live


<script src="https://jsc.adskeeper.com/r/s/rssing.com.1596347.js" async> </script>